
Answer
An AP Manual Check will not print a live check from the system. This process is helpful if there was an electronic, or other payment, done outside of the (MIP) system, but needs to be applied to an open invoice.
in the MIP Web User Interface:
-
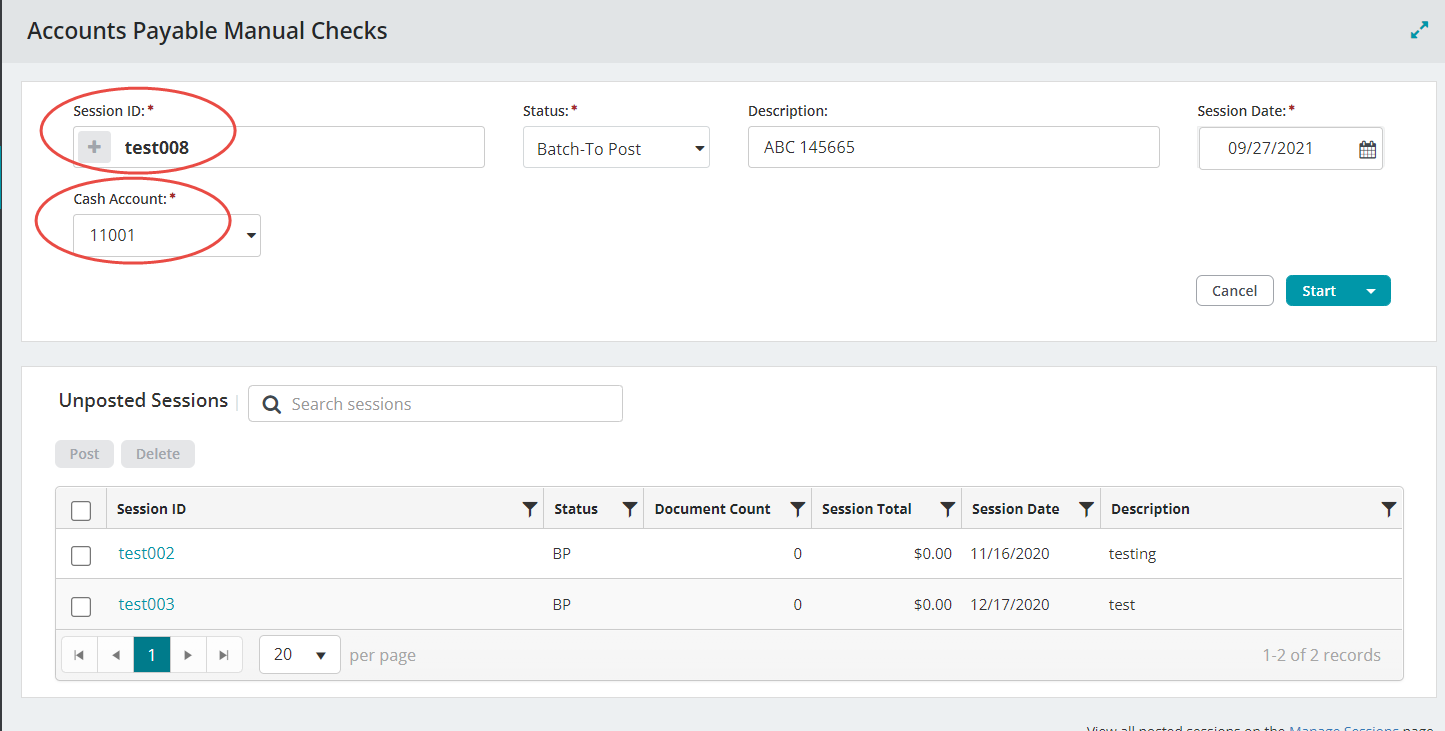
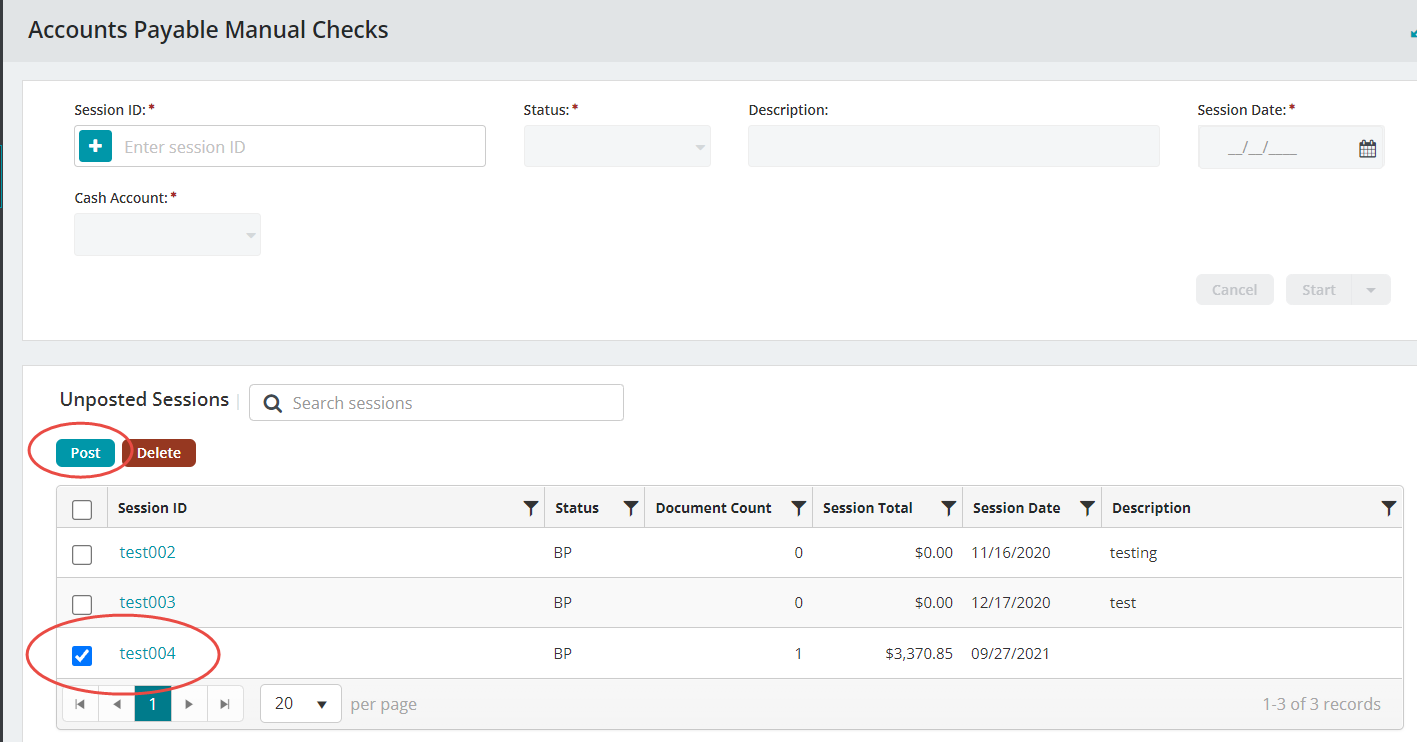
Navigate to Transactions>Accounts Payable> Manual Checks

-
Create a new check “Session ID”.
-
Select the cash account this payment will be from.
-
Edit the description,status and Session Date to meet your organization needs, and press start.
-
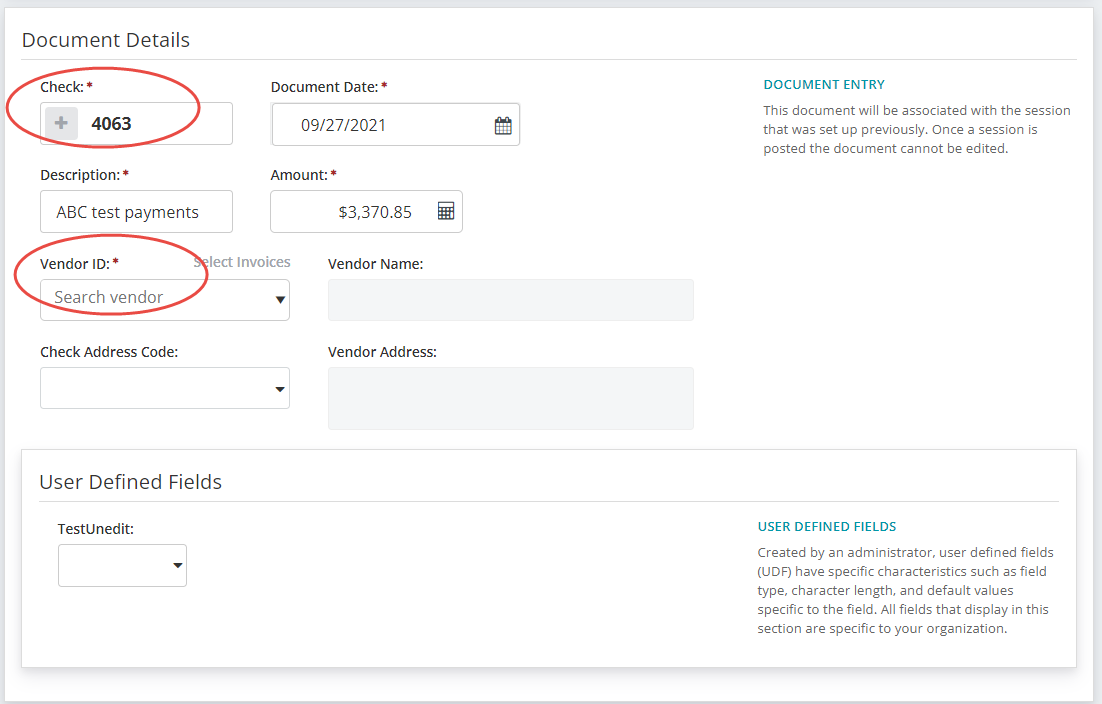
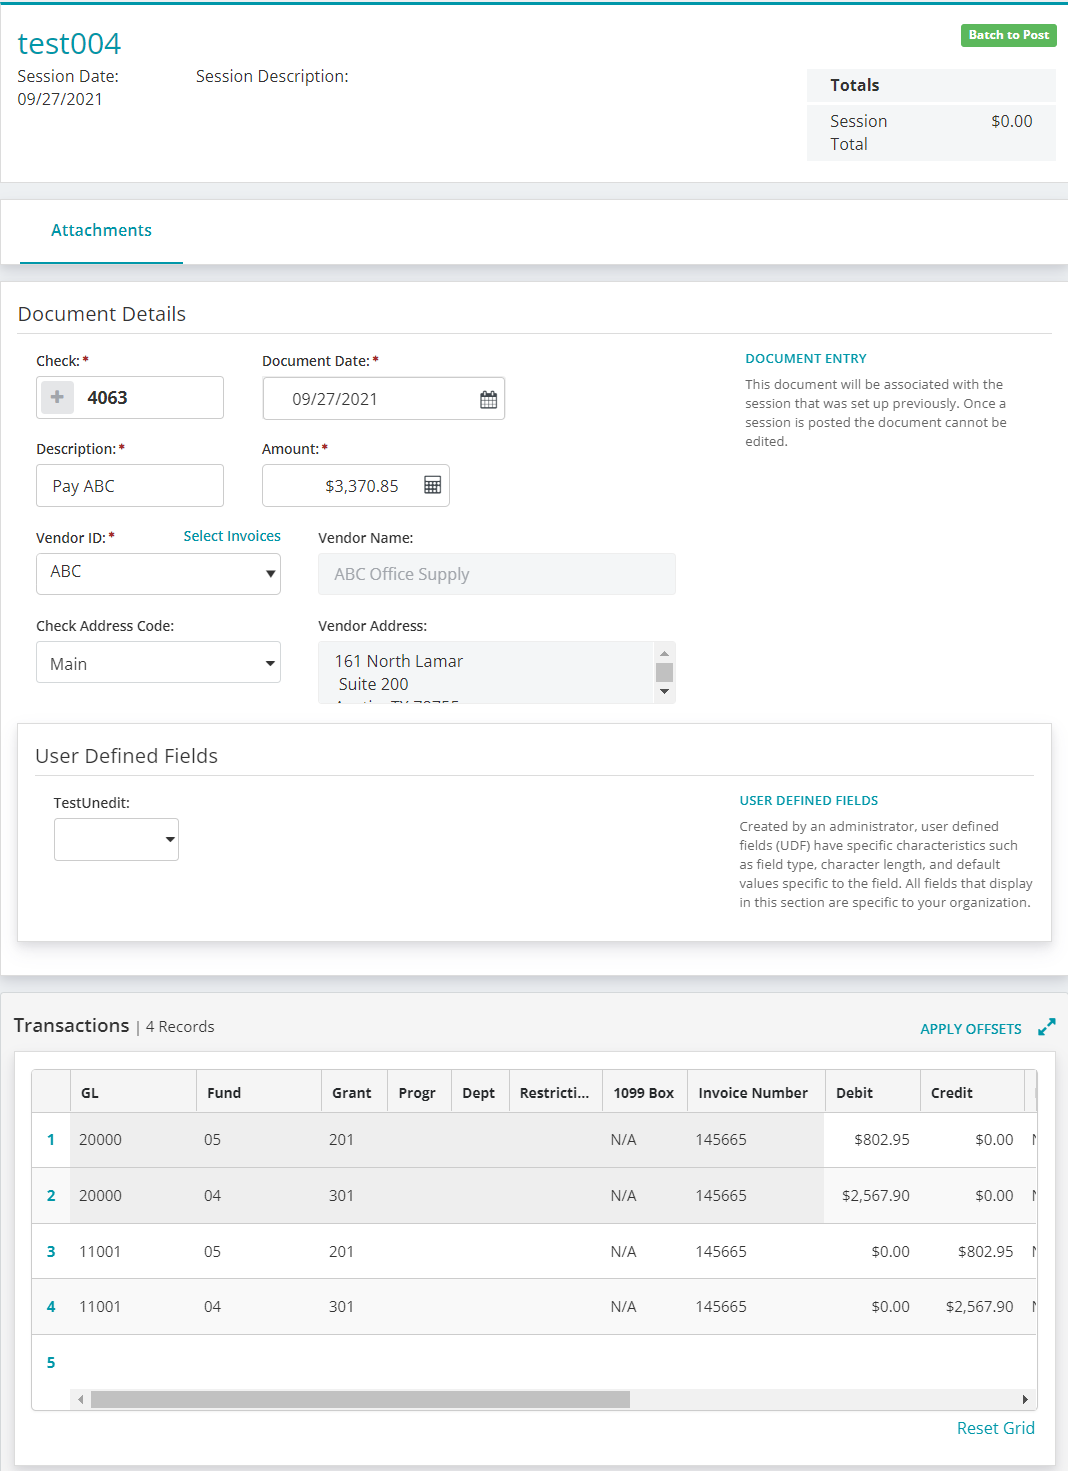
Enter in the check/document number, document date (defaults to today), description and amount.
-
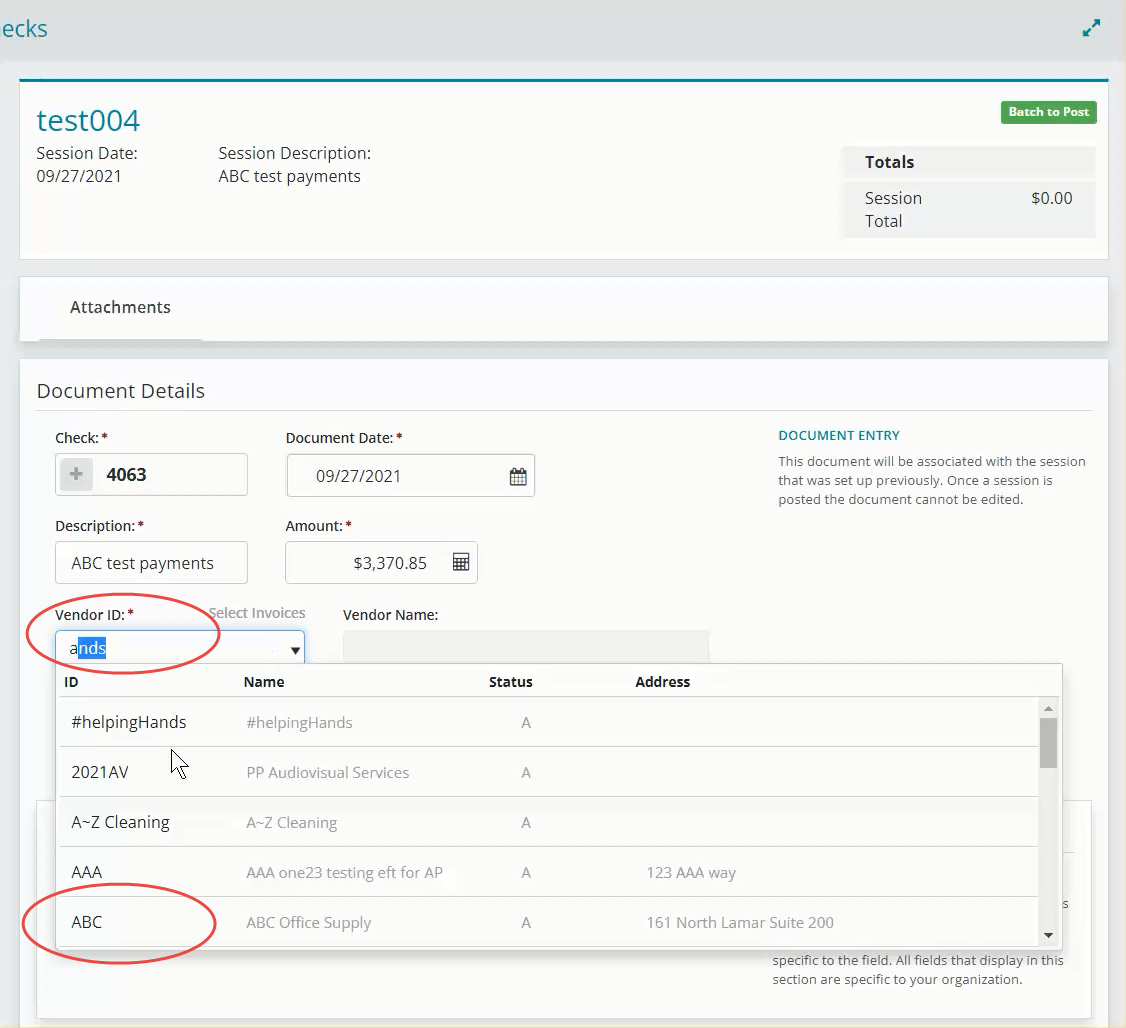
Select the correct Vendor ID (begin typing to filter) from the drop down.
-
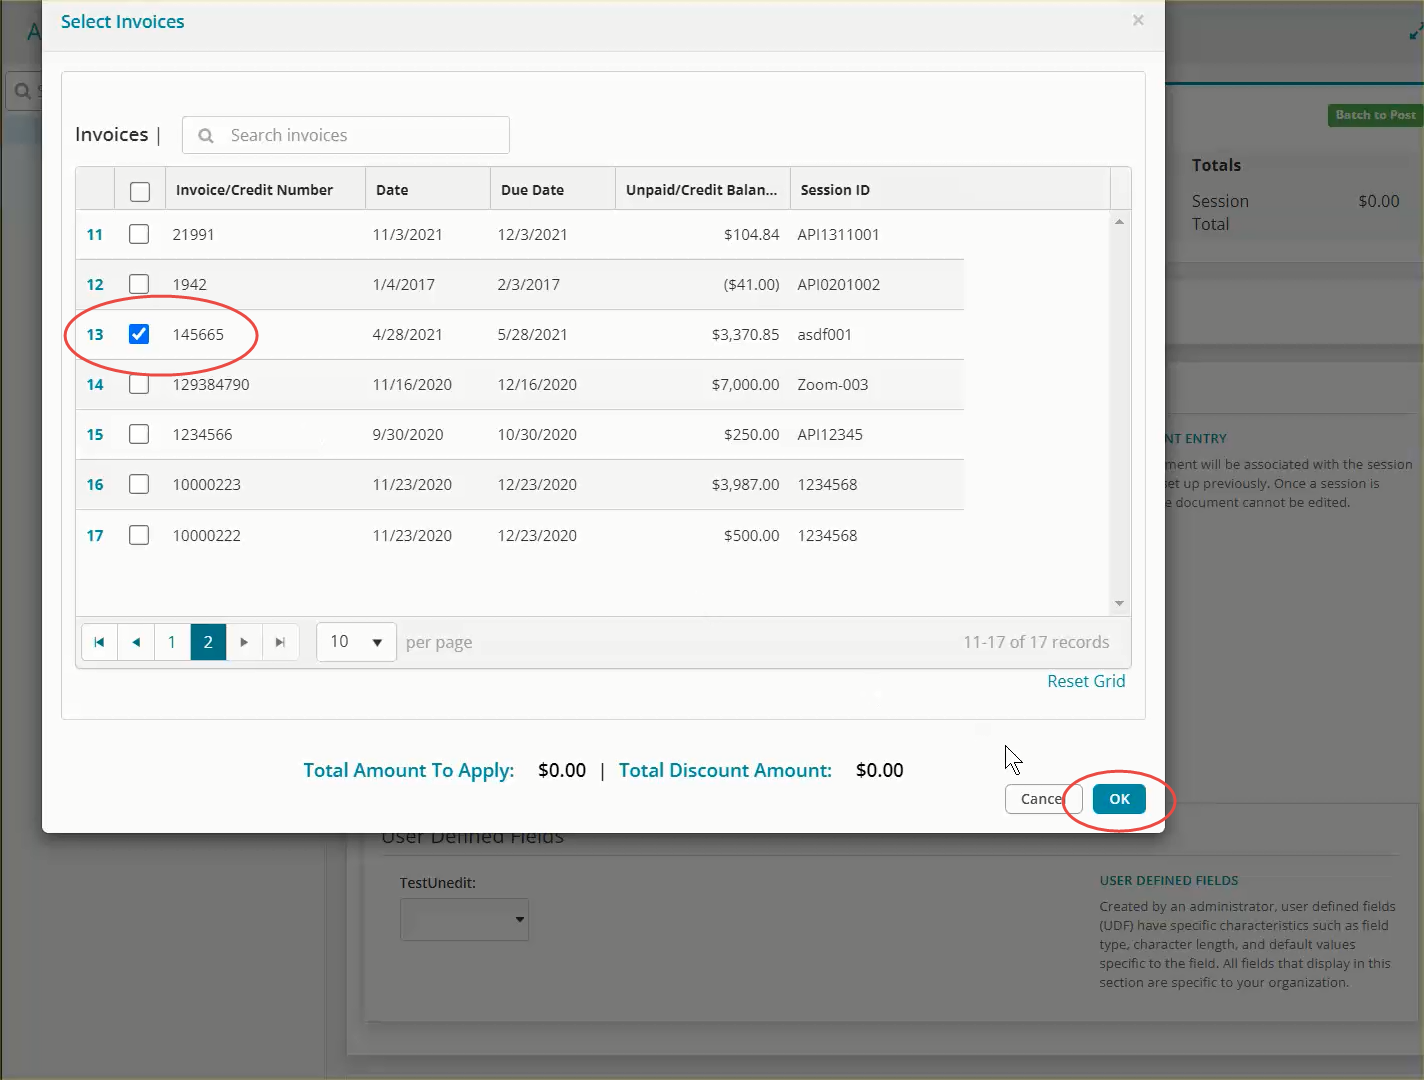
A separate screen will pop up displaying the open invoices available (Posted, not selected for payment) to pay for this vendor.
-
Check the box next to the invoice(s) that this payment will be applied to and press Okay
-
This will fill in the Debit transaction line(s) from the invoice for you. To complete the transaction, will require that you add the offset lines related to the cash account chosen on the session entry screen.
-
Add any attachments as required by your organization.
-
Once all the appropriate information has been added to the document, click “Save and New” to add another document/check or “Save & Close” to go back to the A/P Manual Checks screen to post the session.
-
Select by checking the APC session and click “Post”.
Article Type
Product Info
Product Line
MIP Cloud/Login.mip.com
Product Module/Feature
Accounts Payable
Product Version
2021.1.2
2021.1.1
2021.1.0
2020.3.3.0
2020.3.1.0
2020.3.0.1
2020.3
2020.2
2020.1.4
2020.1.2
2020.1.1
2020.1.0
2020.1
Ranking