
Answer
Start and new Format Details
-
Log in to the MIP Web User Interface. Go to Reports> Finical Statement>Open Formats button
-
Select “Add Financial Statement Format” and complete the “Statement Format Details”. See information about the fields on the right.
-
Select the “Statement Type” (i.e. Statement of Revenue and Expenditures, R/E etc.)

-
Complete the “Format Name”
-
Complete the “Statement Title” and “Description” if desired.
-
Click the “Save” button in the lower right throught the creation process, to save your work so far.
Create the Report Outline (Sections)
-
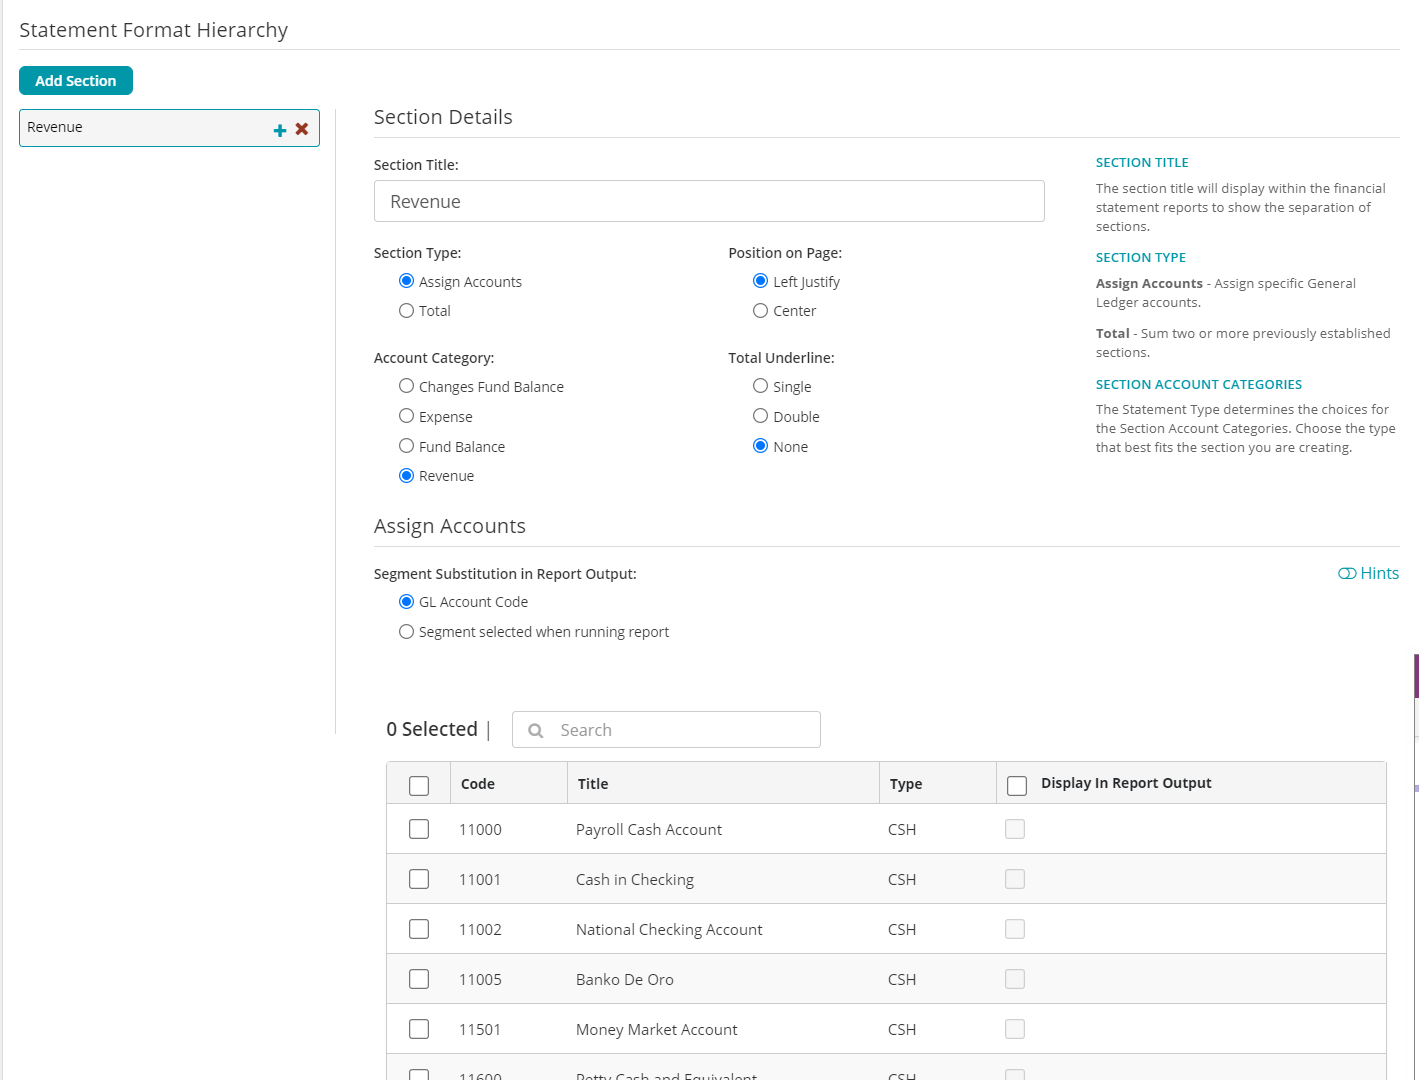
Click the "Add Section" button, and complete the Section Details. Add sections or subsections as needed, in any order you like. Some of the available options will vary depending on the Statement Type you are creating.
-
Enter or edit the “Section Title”. (will display within the financial statement reports)
-
Section Type; This can be a an "Assign Accounts" or "Total" (Sum two or more previously established sections. See section IV below.) type. Select Assign Accounts if you are going to add accounts or if you will make Sub-sections to add accounts. Only the lowest level section can have accounts assigned to them.
-
Select Account Category and other options if available. The options available here will vary depending on the type of financial statement chosen. You should choose the type that fits the section you are creating.
-
To add an additional top level section click the "Add Section" button. Provide a Section Title, and perform steps 3 and 4 again
-
To add a sub Section; click the plus sign next to the section title. (When you add a sub section you can no longer select accounts for the higher section.)
-
Provide a Section Title, and perform steps 3 and 4 again
-
To Delete a section or subsection click the red X of that section.
-
Rearrange sections or subsections by clicking and dragging the section with your mouse.
-
Assigning Accounts to Each Section
-
Assign Accounts: "Segment Substitution in Report Output:" GL Account Code or Segment selected when running report. Toggle Hints on or off on the right
-
If you select "Segment selected when running report" and select the Display in Report Output check box for the selected accounts, you have the choice of printing either general ledger accounts or any other segment of your choice. When you generate the report, choose to substitute Programs on the Options tab, and select the general ledger account code on the Contents tab.
-
Selecting "GL Account Codes" will allow you to specify GL account codes to appear in this section of your reports. Use the search field to filter the total selectable.
-
-
-
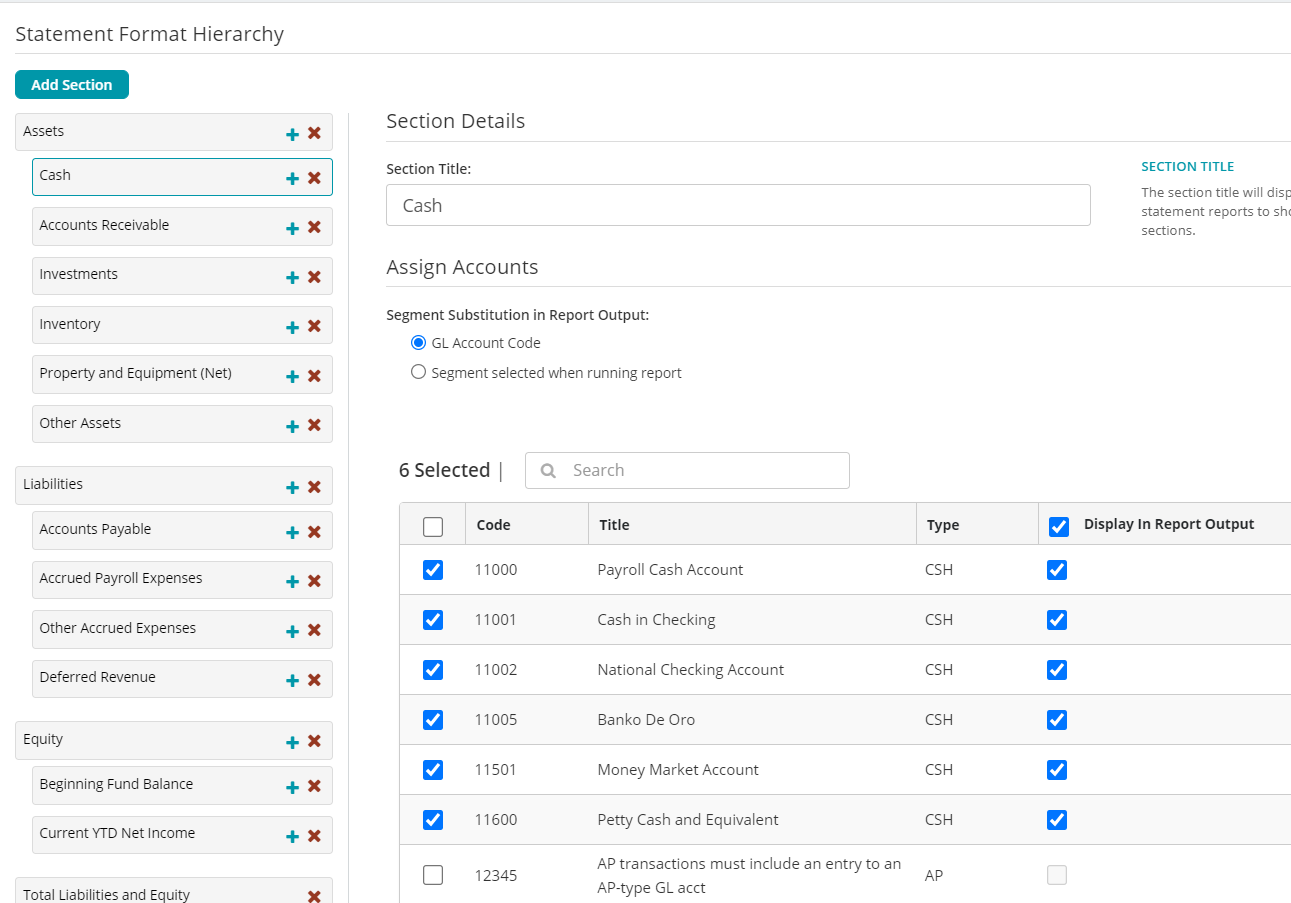
Select GL accounts for each section, checking each GL Code that you wish to display in this section. Each GL Code can show in only one section of the format. If a GL code is not available it maybe in another section, or filtered out by the search field. The top check box selects all within the current search results.
-
“Display in Report Output” check box (on right side) By selecting this checkbox, the General Ledger Account Code will display as an individual line within this section of the Financial Statement report output. Leave the box unchecked, so that the account title does not print and the balance accumulates within the Section as follows:
-
If all the assigned accounts in a Section do not have the Display in Report Output box selected, then the balances of all accounts accumulate into one total with the Section Title.
-
If some assigned accounts in a Section have the Display in Report Output box selected while others do not, then the balances of those accounts that do not have the detail boxes selected accumulate into one total. They display at the end of the Section with a title of "Other" Section.
-
Create a totaling Section
-
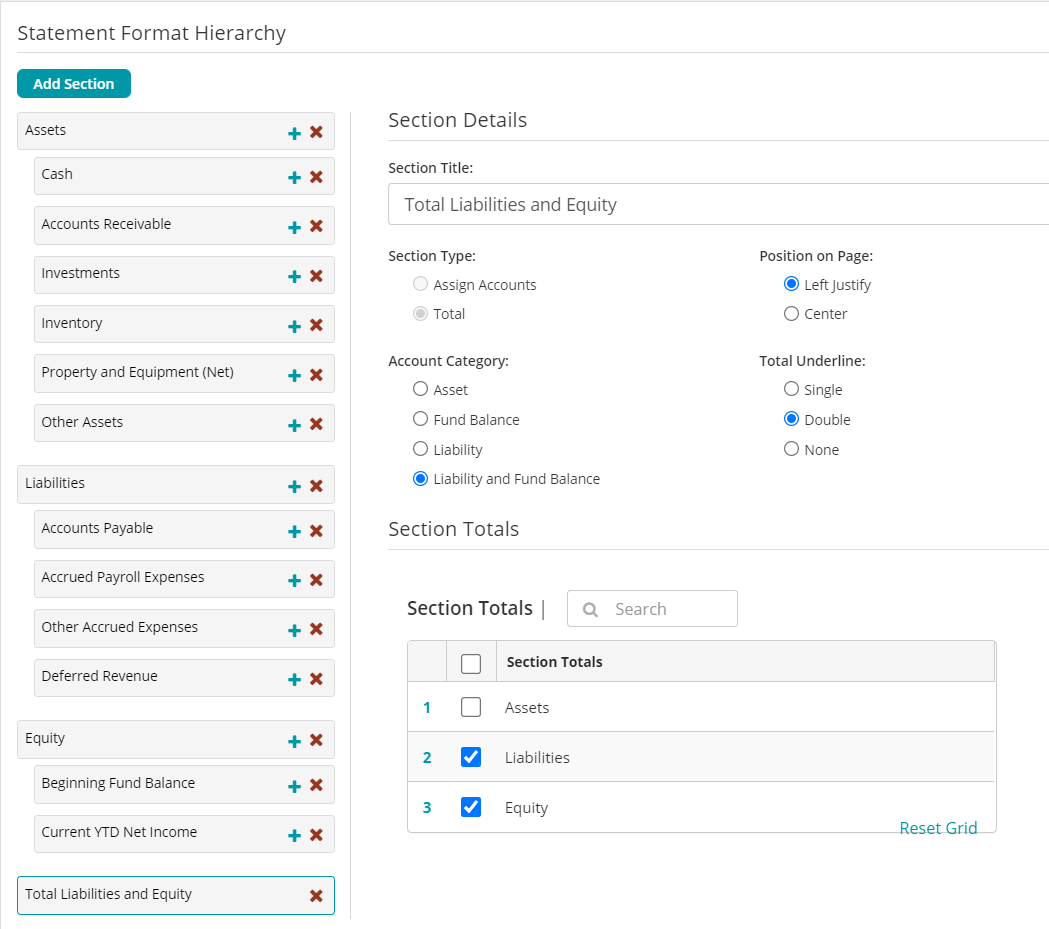
Click the "Add Section" button, and complete the Section Details. Only the top level section will allow you to select Total. The Total section needs to be placed below the sections or sub sections that it will total. Use the mouse to drag and drop sections as needed.
-
Enter or edit the “Section Title”. (will display within the financial statement reports)
-
Section Type; Select the "Total" Radio button.(Sum two or more previously established sections) type.
-
Select Position on Page, Account Category, and Total Underline.
-
Select the sections that will be totaled by this section.
Click Save, and the pop up will indicate successfully saved
Additional Information
Article Type
Product Info
Product Line
MIP Cloud/Login.mip.com
Product Module/Feature
Reporting
Product Version
2021.1.1
2021.1.0
2020.3.3.0
2020.3.1.0
2020.3.0.1
2020.3
2020.2
2020.1.4
2020.1.2
2020.1.1
2020.1.0
2020.1
2019.3.1
2019.3
2019.2
2019.2.0.1
2019.1.4
2019.1.3
2019.1.2
2019.1.1
2019.1
2018.1.6
2018.1.5
2018.1.4
2018.1.3
2018.1.2
2018.1.1
2018.1
Ranking