
Answer
Checks will print using the cash offset account assignment designated for the AP account that you are using to record the invoice.
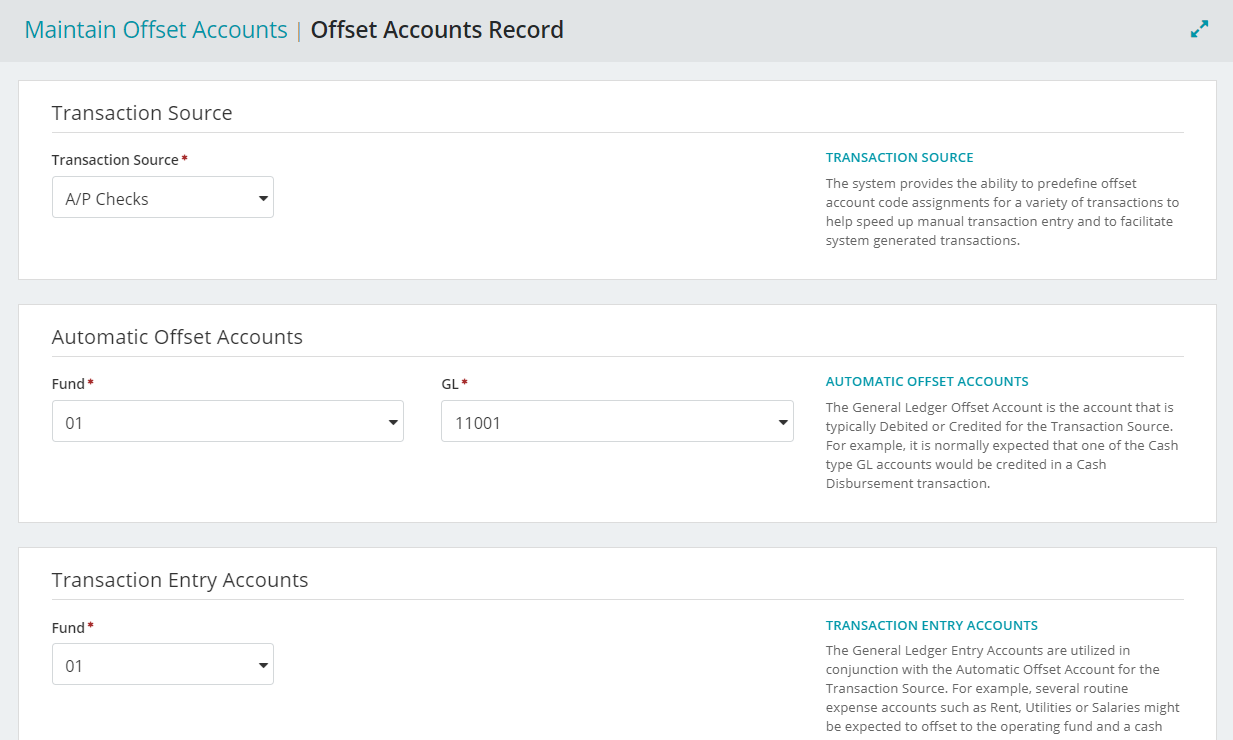
1. Select Maintenance > Offset Accounts > Set Offset Assignment button.

2. Select the Transaction Source ‘APC A/P Checks’.
3. Under the Automatic Offset Accounts Select the Fund Code.
4. Select a different cash account under the GL.
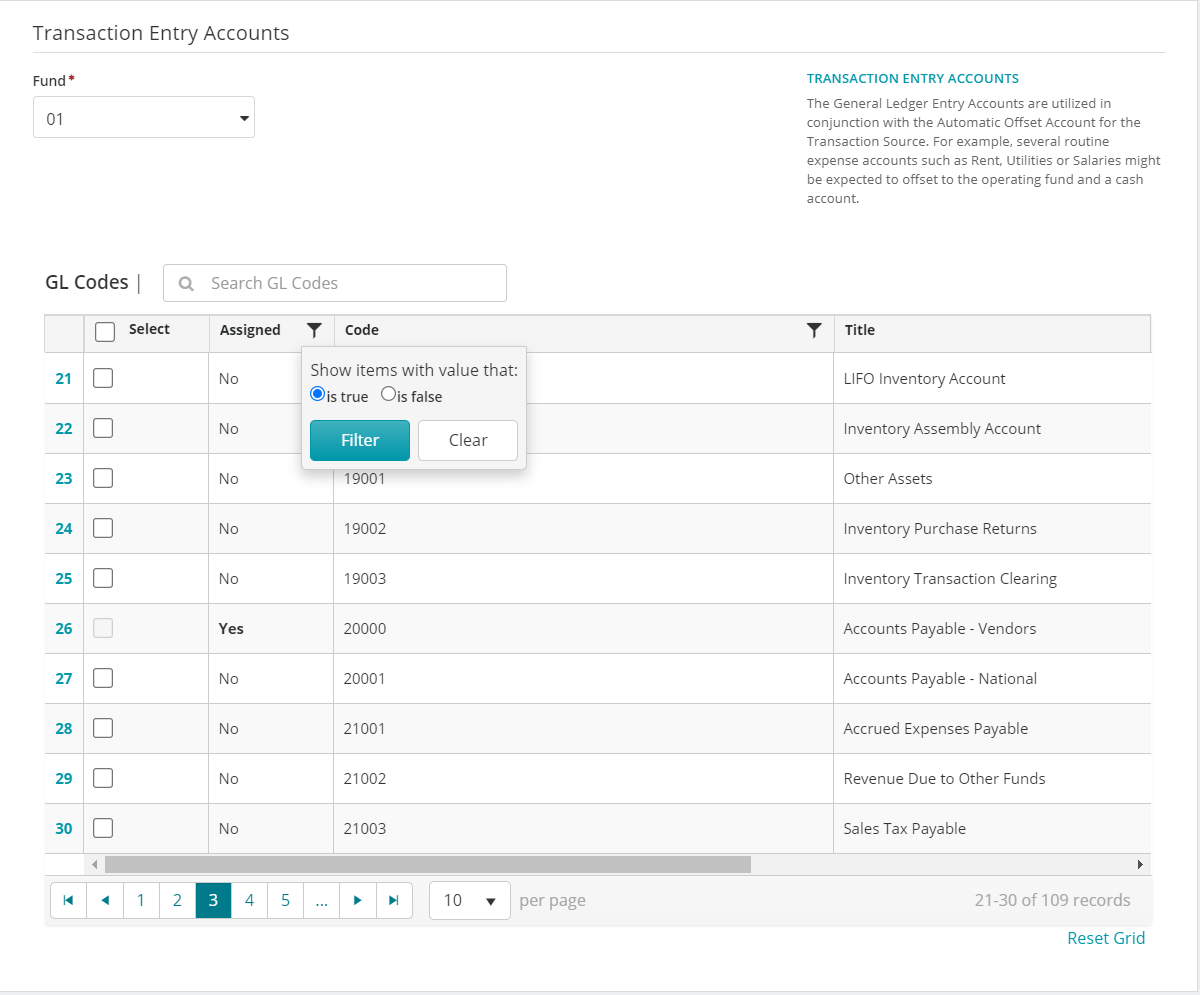
5. Under Transaction Entry Accounts, select the Fund associated with the invoice
6. Select one, multiple, or all of the AP type account in the GL field.
7. A GL account that is “Already assigned” is not selectable. Filter by assigned column for “is true” to identify offsets previously entered, for the fund and GL cash account from above.
8. Click Save.
9. When on the Pay Selected A/P Invoice form, the new cash account is now available.
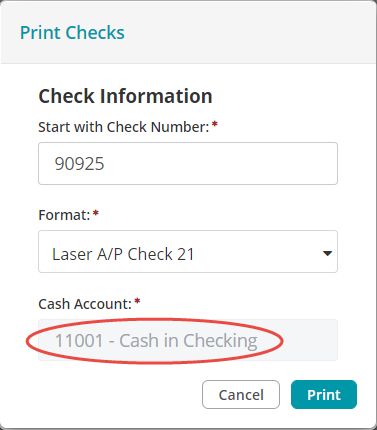
Tip: When using multiple cash accounts, remember to change the cash offset account assignment before printing checks. Access Maintenance > Offset Accounts > Set Offset Assignment as in step one and continue through step eight to switch cash accounts.
Article Type
Product Info
Product Line
MIP Cloud/Login.mip.com
Product Module/Feature
Administration
Product Version
2021.1.0
2020.3.3.0
2020.3.1.0
2020.3.0.1
2020.3
2020.2
2020.1.4
2020.1.2
2020.1.1
2020.1.0
2020.1
2019.3.1
2019.3
2019.2
2019.2.0.1
2019.1.4
2019.1.3
2019.1.2
2019.1.1
2019.1
2018.1.6
2018.1.5
2018.1.4
2018.1.3
2018.1.2
2018.1.1
2018.1
Ranking